Getting started with Sinch In-app Calling for iOS SDK
This guide shows you how to get started integrating your iOS application with the In-app Calling SDK. Because we're just getting started, this guide only covers how to sign in to the In-app Calling SDK and how to make and receive calls. For more complex examples and documentation, check the sample apps inside the SDK package file or look at our iOS documentation.
Prerequisites
- XCode available here.
- In-app Calling SDK for iOS. In this guide, we're using the Swift SDK, but the Objective-C SDK is also available.
Upload your APNs signing keys
When a call is placed from UserA to UserB, Sinch backend delivers a VoIP Push notification via APNs to UserB in order to initiate the call. To allow Sinch to send push notifications on your behalf, you have to upload your APNs signing keys in your Sinch application configuration. You can find instructions on how to generate and upload your APNs signing keys here.
Setup the XCode project
- Start by creating a new iOS app using XCode. Select Swift as a language for your app.
- Download the Sinch Swift SDK from the SDK download page and decompress it. Add
SinchRTC.xcframeworkfolder to your project. Don't forget to embed the framework, or you'll experiencedylibloading failures. - Find the
ringback.wavandringtone.wavaudio files in theVideoCallKitSwiftsample app folder in the decompressed SDK folder, and add them to your app bundle. - Enable "Voice over IP" Background Mode in the "Capabilities" menu of your app in order to integrate CallKit. Invocation to CallKit component will fail if you skip this step.
- Add "Push Notifications" capability to your app. Without this capability, it won't be possible for the app to acquire a device token and receive notifications.
Create the app views
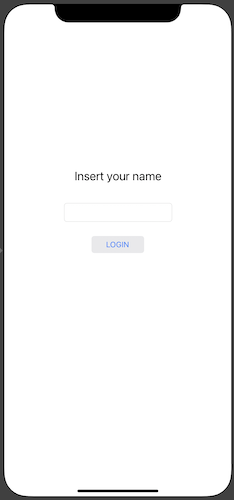
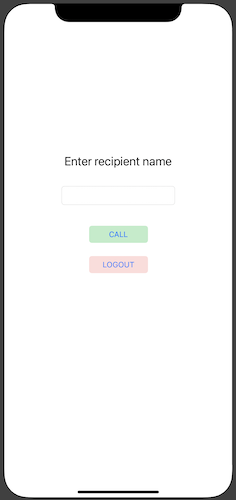
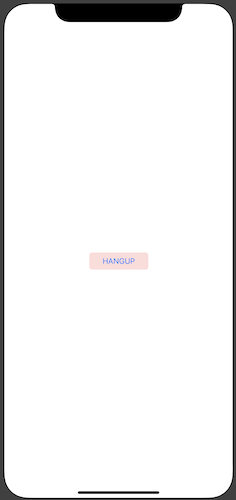
Using XCode's storyboard, create 3 ViewControllers, which are named and look like the following views:
LoginViewController
MainViewController
CallViewController
Enable Sinch logs
When debugging, it might be useful to set a log callback to enable Sinch logging and make it easier to understand potential
problems. You can do that by invoking SinchRTC.setLogCallback(); in this example, it's shown how to extend Sinch class LogSeverity to
include a mapping from Sinch's log severity to OSLogType:
AppDelegate.swift
class AppDelegate: UIResponder, UIApplicationDelegate {
  func application(_ application: UIApplication,
                   didFinishLaunchingWithOptions launchOptions:
                           [UIApplication.LaunchOptionsKey: Any]?) -> Bool {
    SinchRTC.setLogCallback { (severity: SinchRTC.LogSeverity, area: String,
                               msg: String, _: Date) in
      os_log("%{public}@",
            log: OSLog(subsystem: "com.sinch.sdk.app", category: area),
            type: severity.osLogType(), msg)
    }
  }
}

extension LogSeverity {
  func osLogType() -> OSLogType {
    switch self {
    case .info: return .default
    case .critical: return .fault
    case .warning: return .default
    case .trace: return .debug
    default: return .default
    }
  }
}
Note:
Debugging logs can be verbose and may contain misleading messages. We recommend only enabling it when you're investigating specific errors or behavior related to Sinch components.
User registration
In order to place calls between two users, you must register the users on the Sinch backend.
SinchClientMediator
First, create a Config.swift file to store the credentials of your Sinch app on your dashboard to authenticate your Sinch client to the Sinch backend.
Config.swift
let APPLICATION_KEY = "..."
let APPLICATION_SECRET = "..."
Create a SinchClientMediator class; this class will act as:
- wrapper of root Sinch component,
SinchClient - delegate of
SinchClient
In particular, SinchClientMediator owns a SinchClient object, and implements create(withUserId:andCallback:) method that creates and start its Sinch client. Note how
the completion callback is stored in a property, so that it can be accessed later in the SinchClient delegate callback.
In this example app, the instance of SinchClientMediator is owned by AppDelegate, and initialised in AppDelegate.application(didFinishLaunchingWithOptions:).
Make sure the SinchClientMediator variable is public, so that ViewControllers can access it later.
SinchClientMediator.swift
class SinchClientMediator {
  typealias ClientCreationCallback = (_ error: Error?) -> Void
  var clientCreationCallback: ClientCreationCallback!
  var sinchClient: SinchClient?

  func create(withUserId userId:String,
              andCallback callback:@escaping (_ error: Error?) -> Void) {
    do {
      sinchClient = try SinchRTC.client(withApplicationKey: APPLICATION_KEY,
          environmentHost: ENVIRONMENT_HOST,
          userId: userId)
    }
    catch let error as NSError {
      os_log("Failed to create sinchClient", log: customLog, type: .info,
            error.localizedDescription)
      callback(error)
    }
    clientCreationCallback = callback;
    sinchClient?.delegate = self
    sinchClient?.start()
  }
}
Now, create an extension of SinchClientMediator, to make it conform with SinchClientDelegate protocol, to implement credential
provisioning and monitoring of Sinch client status.
Note how the stored copy of clientCreationCallback is used and reset in clientDidStart() and clientDidFail().
SinchClientMediator+SinchClientDelegate.swift
  func clientRequiresRegistrationCredentials(_ client: SinchClient,
              withCallback callback: SinchClientRegistration) {
    do {
      let jwt = try sinchJWTForUserRegistration(
          withApplicationKey: APPLICATION_KEY,
          applicationSecret: APPLICATION_SECRET,
          userId: client.userId)
      callback.register(withJWT: jwt)
    } catch {
      callback.registerDidFail(error: error)
    }
  }

  func clientDidStart(_ client: SinchClient) {
    if (clientCreationCallback == nil) {
      return
    }
    clientCreationCallback(nil)
    clientCreationCallback = nil
  }

  func clientDidFail(_ client: SinchClient, error: Error) {
    if (clientCreationCallback == nil) {
      return
    }
    clientCreationCallback(error)
    clientCreationCallback = nil
  }
Note:
To simplify this tutorial, the creation of the JWT token required to authenticate the Sinch client (see SinchClient docs) is created in the client app.
This is bad security practice as it stores the application secret in the client code. In your real application the creation of the JWT generation should be delegated to your backend. For the implementation of sinchJWTForUserRegistration(withApplicationKey:), please refer to SinchJWT.swift file in Sinch's Swift sample app, bundled together with Swift SDK.
User login
Add a property with type SinchClientMediator to LoginViewController, and assign it to the SinchClientMediator member of AppDelegate.
LoginViewController.swift
    override func viewDidLoad() {
      super.viewDidLoad()
      let appDelegate = UIApplication.shared.delegate as! AppDelegate
      sinchClientMediator = appDelegate.sinchClientMediator
    }
Then, using the Connection Inspector view, implement SinchClient instantiation and user registration as a reaction to tapping the "Login"
button in LoginViewController.
In case of successful creation and start of Sinch client, the app will transition to MainViewController.
LoginViewController.swift
  @IBAction func LoginUser(_ sender: UIButton) {
  sinchClientMediator.create(withUserId: nameTextField.text!) {error in
    if (error != nil) {
      os_log("SinchClient started with error: %{public}@",
             log: self.customLog, type: .error, error!.localizedDescription)
    } else {
      os_log("SinchClient started successfully: (version:%{public}@)",
             log: self.customLog, SinchRTC.version())
    }
  }
  let sBoard : UIStoryboard = UIStoryboard(name: "Main", bundle: nil)
  guard let mainVC = sBoard.instantiateViewController(
           withIdentifier: "MainViewController") as? MainViewController else {
    preconditionFailure("Error MainViewController is expected")
  }
  present(mainVC, animated: true, completion: nil)
}
Next steps
Now that your application is created, you can configure that application to make a call.
